 a journal of interesting technical ideas . . .
I install Linux pretty regularly. Sometimes I’m setting up a new server instance, sometimes I’m deploying it to new hardware. Many times I’m doing a clean install on a new release. Very often, I’m reinstalling my workstation because I want to try a new flavor. Whether you are a distro-hopper or just need to handle Disaster Recovery process, installing Linux and customizing it to fit your particular needs can take a half day or more.
In addition to the time, installing requires you to make sure that you bring critical applications forward, attach to required printers and servers, and put expected security elements in place. It’s easy to forget a step. If you haven’t done it in a while, it’s difficult to remember how to handle a step.
That’s why years ago I started building an install script. These days my I keep it in a private Github repository. When setting up a new instance, I just grab the repo and run script. For the record, it still takes a while, but I don’t have to babysit it.
Login to Github, go to the Repositories tab and click new. Give your repository a name and select “Private”. If you have an existing repository, go to the Settings tab and scroll to the bottom where it says “Danger Zone”. There’s an option to make the repository private. Not everyone makes their install script private, but I worry about revealing details of the programs I use, internal resources, or paths.

Private repos are also good for personal notes and documentation. I used to keep notes in Simplenote, but now I use Visual Studio Code and a private repository. I like having everything I need to reference in my Code workspace. You could also use a private repository for documentation, with a slick pandoc CI process to build EPUB or PDF versions that you deliver (see my article). I used to use Scrivner for writing, but you can setup a similar workflow using Visual Studio Code and Github.
Nope, I’m not going to share my install script. As I said before, it’s private. But let’s talk about what’s in it and how it’s built.
#!/bin/bash
First, it specifies the execution environment. Not all versions of Linux use bash as the default shell for scripts and that other environment may not support the commands I use, so I want to nail this down.
echo "Install some cool essential tools ============================"
apt update
apt upgrade -y
apt install traceroute nmap snapd flatpak htop net-tools gconf2 hugo git geary unzip -y
apt install vlc filezilla pithos pdfshuffler thunderbird wireshark -y
apt install gigolo gvfs-fuse flameshot network-manager-openvpn network-manager-vpnc -y
apt install network-manager-openconnect network-manager-pptp network-manager-openvpn-gnome -y
apt install network-manager-vpnc-gnome network-manager-openconnect-gnome network-manager-pptp-gnome -y
apt install python-software-properties libkf5globalaccel-bin libfreerdp-plugins-standard network-manager-applet -y
add-apt-repository ppa:graphics-drivers/ppa -y
echo "Setup Profile Sync Daemon https://github.com/graysky2/profile-sync-daemon"
#https://github.com/graysky2/profile-sync-daemon
sudo apt install profile-sync-daemon
systemctl --user enable psd.service
systemctl --user start psd.service
apt update
apt upgrade -y
Next, I install a bunch of stuff that I want on any machine I use. For instance, why isn’t traceroute included in everything? Other common pieces include:
Notice that I break the installs into groups - this makes it easier to track down problems if they occur. The “-y” at the end answers “yes” and allows the command to continue without waiting for a response from me. Some of the things I install are already present, but they’re not present on all distros so specifying the tools I want just makes sure that they’re there (if they’re already installed, apt just skips them). A special word about Profile Sync Daemon, since not many folks have heard of it. This puts the browser profile into a ram disk and speeds up the browser.
I wrote about the Powerline shell a while back. Since I started using it, I hate to be without it. Powerline depends on having an appropriate font and I use JetBrainsMono. Finally, I prefer Tilix to the default terminal. This sections makes all those things happen.
echo "Fix terminal ===================================================="
pip3 install powerline-shell
wget https://download.jetbrains.com/fonts/JetBrainsMono-2.225.zip
unzip JetBrainsMono-2.225.zip
cp -R fonts /usr/share/ -r
fc-cache -f -v
apt install tilix -y
echo 'function _update_ps1() {
    PS1=$(powerline-shell $?)
}
if [[ $TERM != linux && ! $PROMPT_COMMAND =~ _update_ps1 ]]; then
    PROMPT_COMMAND="_update_ps1; $PROMPT_COMMAND"
fi' >> /home/brent/.bashrc
Note that I’m using an echo to give some feedback about where we are in the process. I download the font, move it to the correct directory, and update the font cache so it’s usable. The rest of this downloads Powerline and sets it up, plus grabs Tilix.
echo "Cleaning up................"
rm JetBrainsMono* -f
rm -rf fonts
\## Reminders
echo "Set JetBrains Mono as terminal font"

At the end of the script, I have a clean up section and remove the Font files that were left in the install directory. I don’t know how to programmatically tell Tilix to use JetBrains Mono in it’s default profile (help!), so I just remind myself to do that.
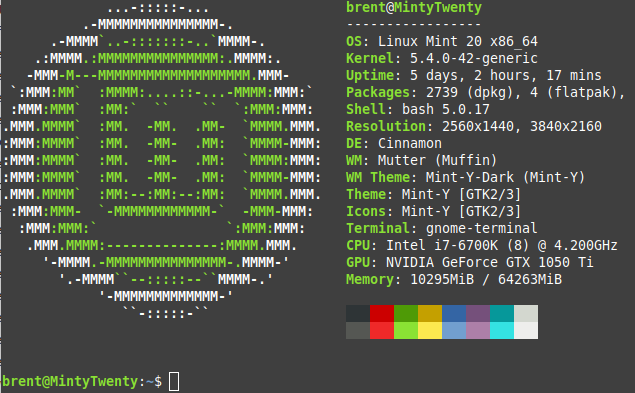
I have a series of sections for handling optional components. The first three optional sections are almost always turned on: the Firewall, Neofetch, SSH and NFS.
The structure of these loops is a for statement terminated by done. Since the conditions of the for are empty, it will loop continually until told to break. Pressing a “y” or “n” executes some logic and breaks, any other key causes it to loop again. I’m not sure this is the best way to do it, but it works. In Bash, watch the spacing around the brackets and parentheses because it is required!
for (( ; ; ))
do
echo "Would you like to enable the firewall (y/n)?  "
Read VAR
if [[ $VAR = "y" ]]
then
echo "Enable Firewall"
ufw enable
break
fi
if [[ $VAR = "n" ]]
then
echo "skipping............."
break
fi
Done
for (( ; ; ))
do
read VAR
if [[ $VAR = "y" ]]
then
add-apt-repository ppa:dawidd0811/neofetch -y
apt-update
apt install neofetch -y
echo "neofetch" >> /home/brent/.bashrc
break
fi
If [[ $VAR = "n" ]]
then
echo "skipping............."
break
fi
done
for (( ; ; ))
do
echo "Would you like to install SSH and NFS (y/n)?  "
read VAR
if [[ $VAR = "y" ]]
then
echo "Setup SSH and nfs ==========================================="
apt install openssh-server sshfs fail2ban nfs-kernel-server nfs-common -y
systemctl start fail2ban
systemctl enable fail2van
echo "/[sshd]
enabled = true
port = 22
filter = sshd
logpath = /var/log/auth.log
maxretry = 3" >  /etc/fail2ban/jail.local
break
fi
if [[ $VAR = "n" ]]
then
echo "skipping............."
break
fi
done
 The next sections are things that I would usually want, but not always. One example is KDE Connect - on Gnome I use the Gnome Connect extension and don’t need to load it. Other critical tools that I present as an option to myself include:
This isn’t a perfect script, but the structure allows me to re-run it as many times as I need to and skip the sections that are already installed. The biggest issue is that new versions (like 21.04 when it comes out in a few months) typically aren’t represented in PPAs. The fix is to specify an older version to pull from, but that’s not automated. Still, this speeds up the process and takes less of my time.
Another major piece missing here is drive mapping. I typically mount foreign drives using either NFS or SSH. Although my script pulls in SSH and NFS utilities, it doesn’t actually connect shares. I’ve chosen to leave that out and create a separate file for doing that. This is easier to maintain, and there are cases where I want to rerun the mappping file without all the other installs.
One of the things that makes it so easy for me to stand up new machines or to distro-hop is that all my files are saved onto a central server. I have an Ubuntu Mate install that just acts like a big file share. This also simplifies backup, since I can concentrate on one server. The files on the workstations are all transient.
That’s the deal. I can run this script, make a few selections, and be up and running on a new machine pretty quickly with minimal effort. I’m tried to show some examples of different kinds of installations, including web downloads and apt-based. The basic structure is 1) Must Haves, then 2) Optional components encased in loops for easy selection, and 3) a clean-up section.
I’d love to include VSCode extensions, Gnome extensions, and auto-checking for PPA support into the script. If anyone has a good refence, I’d appreciate it. In the meantime, this automates 90%. Good luck creating a similar project!