 a journal of interesting technical ideas . . . a journal of interesting technical ideas . . .
I’m running GNS3 on Proxmox. GNS3 on ESXi is fairly straight forward, but there are some tweaks needed to support Proxmox.
Proxmox virtualization is Qemu-based and the GNS3 VM is distributed for VirtualBox, VMWare Workstation, VMWare ESXi, and Hyper-V. I’ve worked around that by running GNS3 in VMWare Workstation, but I’ve run into some issues with Workstation causing my machine to “freeze” so I got interested in moving the GNS3 VM to my virtualization host. A little poking around found that other people have been successful with this and provided some ideas.
Nothing stands still, so before we get into instructions I’ll date this article. This was originally written in January, 2023, and updated in October, 2025.
tar xvf GNS3_VM.ova
    # sftp brent@server
    sftp> cd import
    sftp> put GNS3_VM-disk1.vmdk
    sftp> put GNS3_VM-disk2.vmdk
Create a new Qemu VM in Proxmox by clicking the “Create VM” button in the upper right of the management page. 
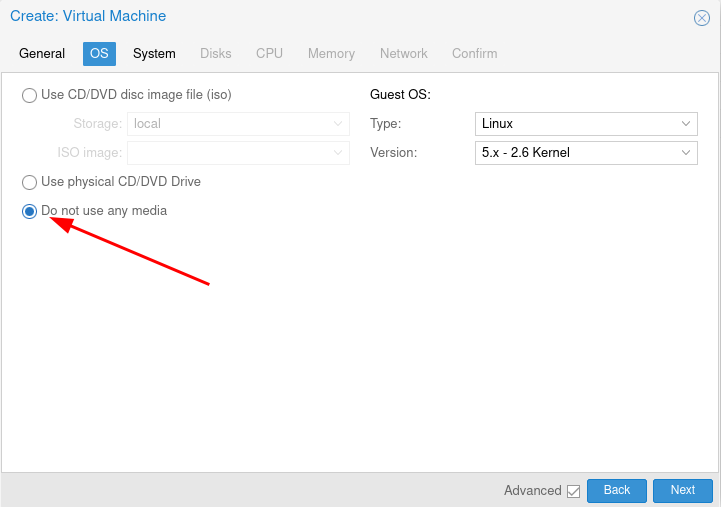
You can accept the defaults on the General tab. Under OS, steup the VM without any media.
Accept defaults on the System tab and Disks tab. I set my VM to use 4 processors (2 sockets, 2 cores each) and set the default memory to 16GB. I didn’t see a lot of guidance on this, so that was a SWAG. Note the ID (105 in my case).

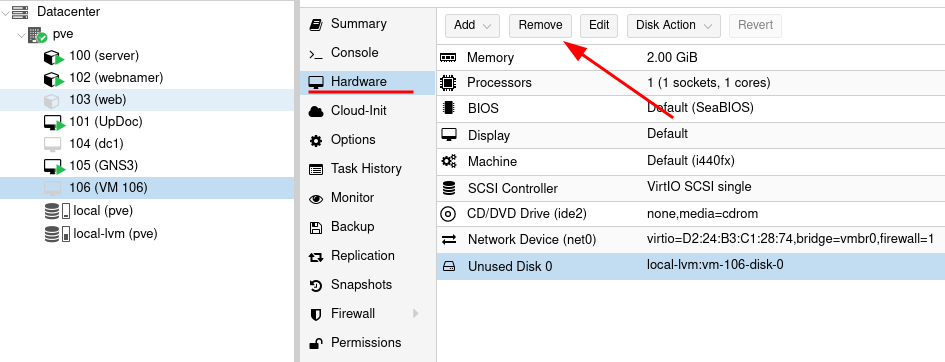
After the VM is created, select the VM, go to the Hardware section, and select the disk. Click Detach and then Remove from the menu bar.
Import the VMDK disks into Proxmox. SSH into the host and use the qm command to convert the disk to QCOW2 format and import it for use. Change the machine ID (105 is my GNS3 VM) and make sure the VMDK file name matches before running the command below.
    root@pve:~/import# qm importdisk 105 GNS3_VM-disk1.vmdk local-lvm -format qcow2
    importing disk 'GNS3_VM-disk1.vmdk' to VM 105 ...
    Logical volume "vm-105-disk-0" created.
    transferred 0.0 B of 19.5 GiB (0.00%)
    transferred 200.0 MiB of 19.5 GiB (1.00%)
    transferred 400.0 MiB of 19.5 GiB (2.00%)
    ...
Attach the QCOW2 images to your VM using the Add button.
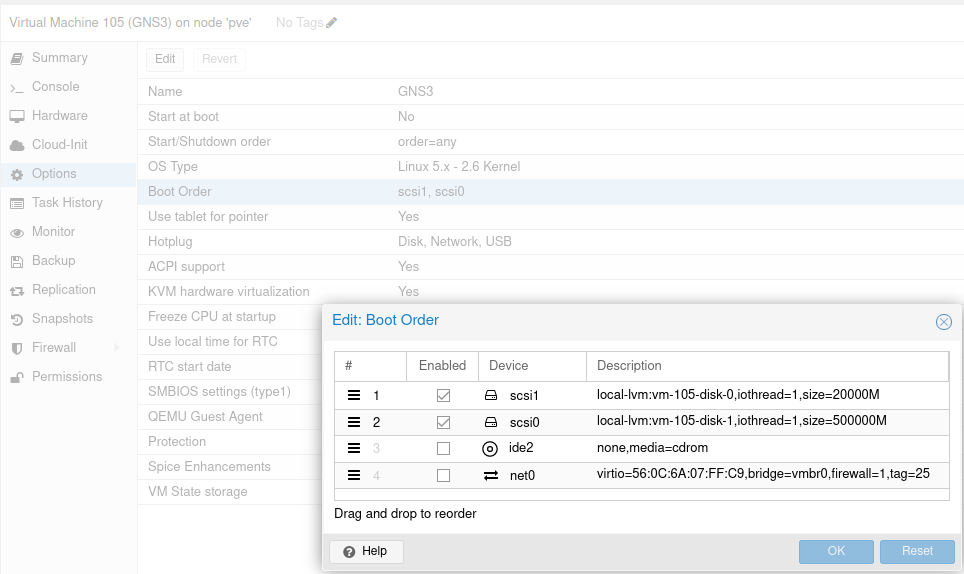
Go to the Proxmox admin page, select the VM, select options, and set the boot order. Double-click the boot Order line and a window will appear to allow you to drag the disk into the correct order. Disk1, the smaller of the two images, should be enabled and the boot drive.
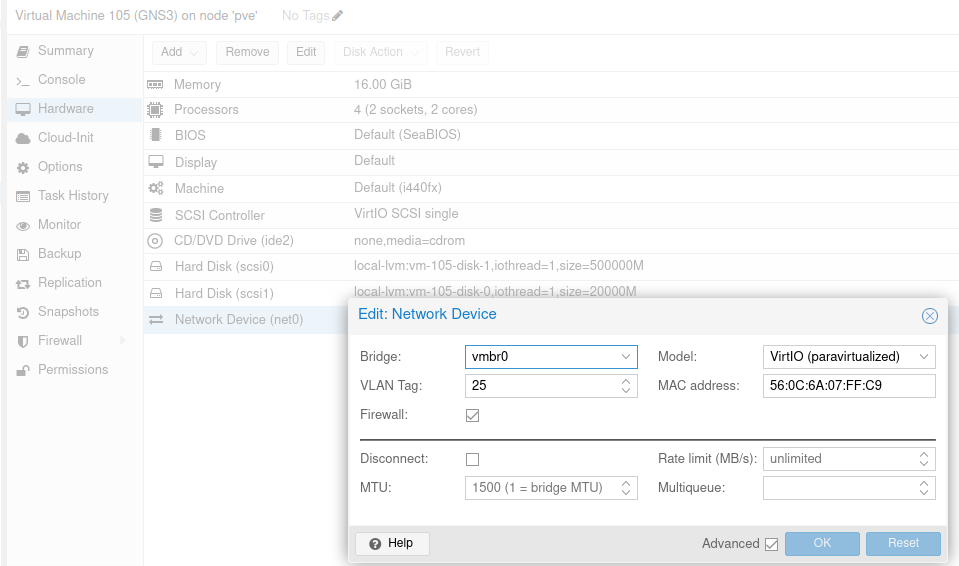
You can also use another tweak: Go into Hardware and double-clicked the Network Device to put the device into a VLAN by setting the tag.
Start the VM. GNS3 started up in the correct VLAN and grabbed a DHCP address. Opening a console, the boot screen of the VM shows the IP address assigned. Accessing this address from a browser will provide the GNS3 web console. You can also use this address in the GNS3 front-end to identify the back-end server.